We are huge fans of Thai food in this family and Tom Yum Soup is one of our favourites. We also love homemade chicken fingers. So, BAM! I smooshed them together.
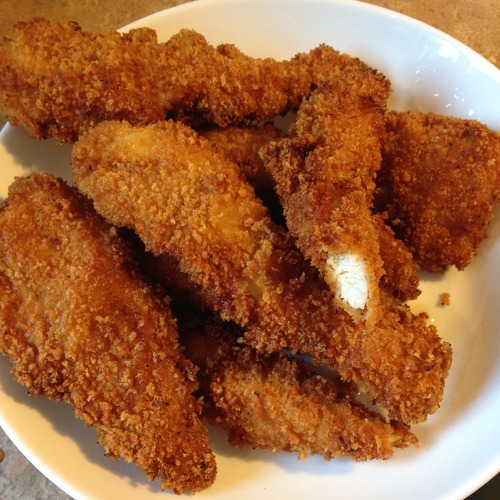
I normally coat the chicken strips in flour first, then buttermilk and then the breadcrumbs, but the first time I made these, I made a huge mistake. As I was cutting up the chicken I stuck it right in the buttermilk without flouring first. When I finally noticed, I panicked, shook off the buttermilk from each strip, dipped them in flour back in the buttermilk and then in the breadcrumbs, hoping really bad that they would turn out. Not only did they turn out, but they were “the perfect chicken fingers” according to my family. A nice thick layer of flavourful crunch on the outside, but moist and juicy in the middle.
You can opt to follow the deep fry instructions for these babies or the oven baked instructions. I have tried both methods and although we all prefer the deep fried version, baking them isn’t as messy, smelly or unhealthy.
If Tom Yum Soup isn’t your thing, replace the spice mix with 1-2 tablespoons of whatever you like. Taco or fajita seasoning, curry paste, mustard, honey mustard, Sriracha, steak spice, or your favourite type of pre-blended seasoning (like Cajun, Lemon Pepper or Piri Piri) would also be excellent.
Tom Yum Chicken Fingers
For 4
- 1 package of Tom Yum Soup spice paste (I used Asian Home Gourmet brand from Loblaws that serves 4 bowls of soup – it’s about 2 Tbsp. of paste)
- 1 1/2 cups buttermilk
- 3 fresh chicken breasts, cut into strips
- 1 1/2 cups self-rising flour (You can make your own if you don’t have any on hand. Follow directions here.)
- 3 heaping cups panko bread crumbs (white or whole wheat)
- Peanut oil – for deep frying, you need about 3 inches up the side of a large, wide pan or wok. For oven baking, you only need about 3 tablespoons.
In a large bowl, whisk together the Tom Yum spice paste and buttermilk. Pour about half of this mixture into a separate large bowl. Add the chicken strips to one of bowls of the mixture and stir to coat. Set aside.
Measure your self rising flour into a large pie plate and measure your panko breadcrumbs into another large pie plate.
Create an assembly line on a long table or counter: first the buttermilk coated chicken strips, then the flour, then the other bowl of buttermilk mixture, then the breadcrumbs and finally a parchment-lined baking sheet.
This next part gets messy. I prefer to do this one-handedly and one chicken finger at a time, so that I always have one hand clean and the finished fingers go right onto the baking sheet at the end of my assembly line.
Take a chicken strip out of the buttermilk mixture and carefully shake it off a bit. Then, dip it in the flour, coating it well. Next, dip it in the chicken-less buttermilk mixture (carefully shaking it off a bit again) and finally into the panko breadcrumbs. Each chicken strip should have a good, even coating on it and you shouldn’t be able to see the chicken through it.
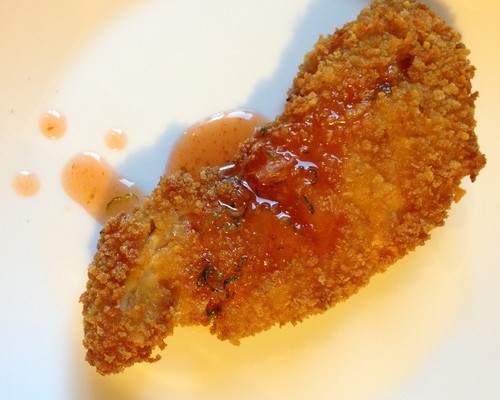
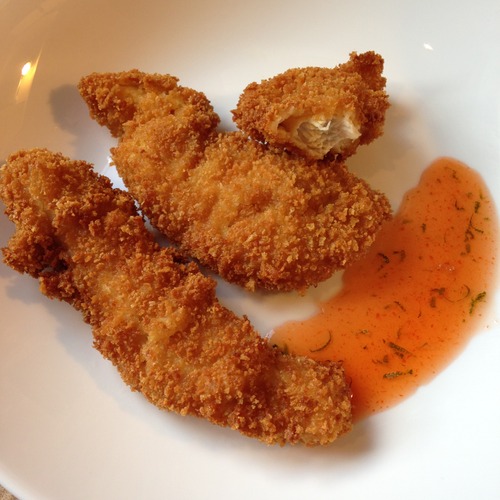
For the deep fry method: Over medium heat, heat your peanut oil up to 350 degrees F in a large, wide pan or wok. Heat your oven to 200-225 degrees F to keep batches of cooked chicken fingers warm while you continue deep frying. Fry them in batches for about 7 minutes, carefully flipping halfway through with tongs. I can fit about 6-7 chicken strips in my pan per batch, but it depends on the size of your pan/wok. You don’t want to overcrowd the pan or they won’t cook properly, so make sure there are a few inches around each finger as they cook. Check the temperature of the oil frequently to make sure it is still at 350 degrees F. You may need to adjust the heat while they cook and in between batches. Have a plate with some paper towels on it ready. As the fingers are finished, briefly blot them on the paper towels to remove some of the excess oil and then place them in the pre-heated oven on a baking sheet or large oven safe dish. Continue frying the chicken fingers in batches until done. Serve warm with Honey, Lime & Sriracha Dipping Sauce (recipe follows).
For the oven method: Preheat your oven to 425 degrees F. Depending how large your baking sheets are, you may need to separate the chicken fingers onto 2 separate parchment-lined sheets. They should be about 1-2 inches apart on the baking sheets. Drizzle each chicken finger with a bit of the peanut oil. Bake for 20-25 minutes or until crispy & cooked through, flipping halfway through. Serve warm with Honey, Lime & Sriracha Dipping Sauce (recipe follows).
Honey, Lime & Sriracha Dipping Sauce
- 1/2 cup honey
- the zest and juice of 1 lime
- 1 Tbsp. Sriracha sauce
In a small bowl, whisk all ingredients together and serve as a dipping sauce.
